Sending a signed document by email is simple and efficient. You need a few tools and steps.
In today’s digital age, sending signed documents by email has become a standard practice. Whether you’re finalizing a business deal or completing personal paperwork, knowing how to do this can save you time and hassle. Gone are the days of printing, signing, and scanning documents.
Now, with the right tools, you can sign electronically and send your documents in minutes. This method is not only convenient but also secure, ensuring that your signed document reaches the recipient promptly and safely. Let’s explore how you can quickly and easily send a signed document by email, making your life a bit simpler.
Preparing The Document
First, scan the signed document and save it as a PDF. Next, attach the PDF to your email and send it.
Preparing the Document
Sending a signed document by email might seem daunting if you’re not familiar with the process. However, preparing the document properly is the first and most crucial step. This section will guide you through the essential steps, ensuring your document is ready to go.
Choose The Right File Format
Choosing the correct file format is essential. PDF is usually the best choice. It preserves the document’s layout and ensures it looks the same on every device.
Word documents are another option but can sometimes lose formatting. Stick with PDF for a professional finish.
Consider what your recipient prefers. If they request a specific format, follow their instructions.
Scan Or Digitize The Document
If your document is on paper, you need to scan it. Use a scanner or a scanning app on your phone. This will create a digital version of your document.
Ensure the scan is clear. Blurry or dark scans can be hard to read.
If you don’t have a scanner, take a clear photo. Ensure the lighting is good and the document is flat.
Personal tip: I once sent a signed document using my phone’s scanning app. It was quick and easy, and the recipient had no issues with the clarity.
Now, what if you need to add a digital signature? Many PDF editors allow you to add your signature directly.
Would you rather use a stylus or a touchpad? Digital signatures can be done in various ways, making the process smoother.
Preparing your document correctly ensures a smooth process and leaves a good impression. What’s your preferred method for digitizing documents?
Signing The Document
Sending a signed document by email can seem daunting, but it’s quite straightforward once you know the options available for signing. Whether you prefer electronic signatures or a physical signature, both methods are easy to use and ensure your document is legally binding. Let’s dive into the different ways you can sign your document before sending it via email.
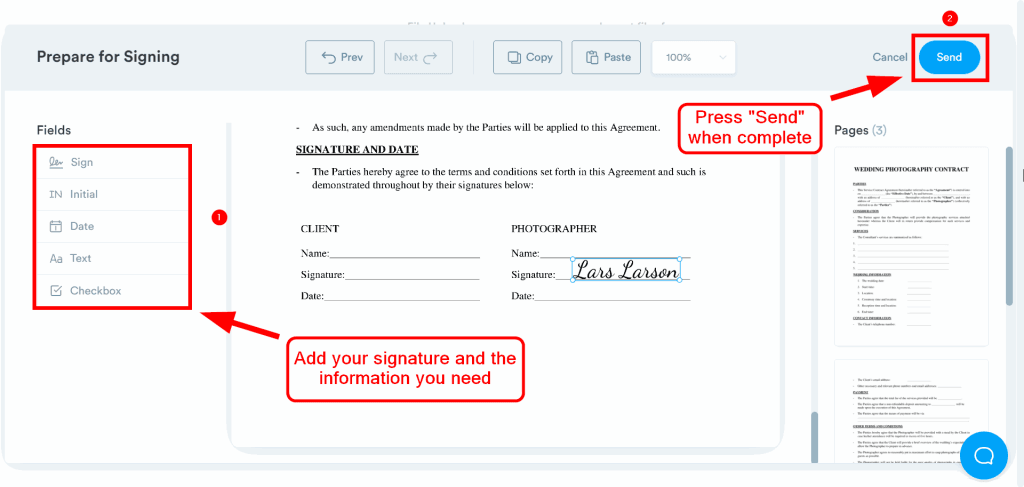
Electronic Signature Options
Electronic signatures are a modern and convenient way to sign documents. They save time and eliminate the need for printing and scanning.
Several tools offer electronic signature services, such as DocuSign, Adobe Sign, and HelloSign. These platforms are user-friendly and widely accepted in business transactions.
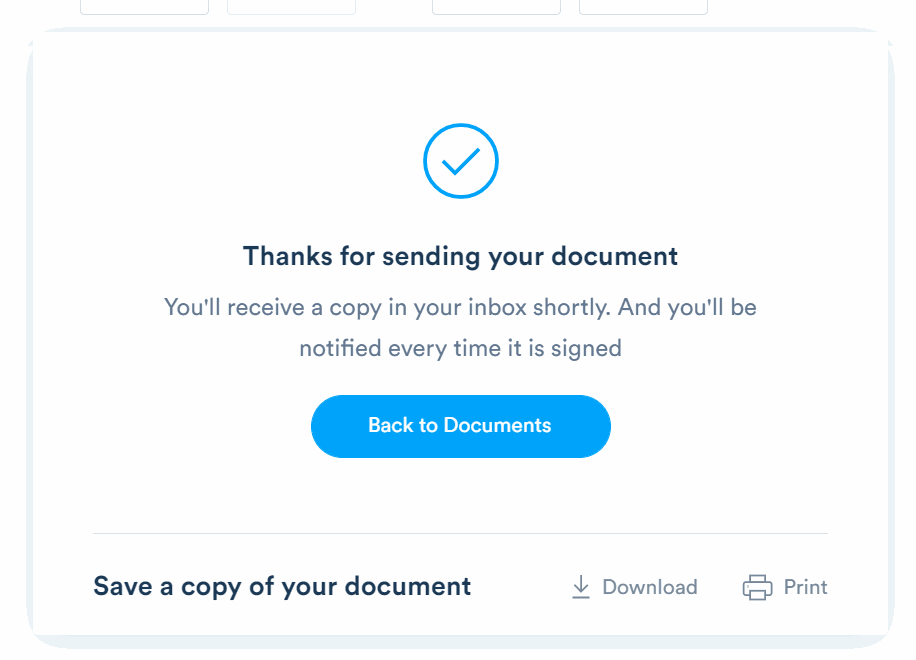
To use an electronic signature, upload your document to the service, add your signature, and download the signed document. It’s quick and secure.
If you’re signing an agreement or contract, electronic signatures are legally binding in many countries. Check the regulations in your area to ensure compliance.
Using A Physical Signature
Sometimes, you might prefer a physical signature, especially for formal documents. This process is simple and just requires a few steps.
First, print the document. Then, sign it using a pen. Make sure your signature is clear and legible.
Once signed, scan the document to create a digital copy. You can use a scanner or even your phone’s camera for this step.
Save the scanned document as a PDF to ensure it retains its format when emailed. Now, it’s ready to be sent.
Have you ever experienced the frustration of trying to scan a document with poor lighting or a low-quality camera? Ensuring good lighting and using a reliable scanner can make a huge difference.
Now that you know how to sign your document, which method suits your needs best? Whether you opt for an electronic signature or a physical one, both methods will help you send your signed document by email efficiently.
Saving The Signed Document
Save the signed document on your computer first. Open your email, attach the file, and send it to the recipient. Ensure the document is in a readable format like PDF.
Saving a signed document correctly is essential to ensure that it remains secure, accessible, and organized. Once you’ve successfully signed a document, the next step is to save it in a way that protects its integrity and allows for easy retrieval. Let’s dive into some critical aspects to consider when saving your signed document.
Ensuring Document Security
Security is paramount when saving a signed document. Always save your document in a secure location, such as an encrypted folder on your computer or a trusted cloud storage service like Google Drive or Dropbox.
Use passwords to protect the file itself. Most PDF editors and document management systems allow you to add password protection to your files. This ensures that only authorized individuals can access the document.
Regularly update your passwords and use a mix of letters, numbers, and symbols. This makes it harder for anyone to guess or hack your credentials.
File Naming Conventions
Proper file naming conventions are essential for easy document retrieval. Name your files in a way that is both descriptive and consistent.
Include essential details in the file name, like the document type, date, and the name of the parties involved. For example, “Signed_Contract_JohnDoe_20231015.pdf” is a clear and organized name.
Avoid using spaces or special characters in file names. Instead, use underscores or dashes to separate words. This prevents any issues when sharing or uploading the document.
By following these steps, you’ll find it much easier to locate and manage your signed documents. Have you ever struggled to find an important document because of poor naming conventions? Implementing these simple changes can make a world of difference.

Credit: signeasy.com
Attaching The Document To An Email
Sending a signed document by email is a simple task. This guide will show you how to attach the document to an email, ensuring it reaches the recipient quickly and securely. To ensure your signed document is protected during transmission, consider using secure email services or encrypting the attachment. Additionally, it’s essential to verify the recipient’s email address before sending, which is a key aspect of how to send documents securely. Following these steps will help maintain the confidentiality and integrity of your important files.
Choosing The Right email service
First, select an email service you trust. Popular options include Gmail, Yahoo Mail, and Outlook. These services are reliable and user-friendly. Ensure you have an account with the chosen service.
Each email service has its own features. Choose one that suits your needs. For example, Gmail allows large attachments. Outlook integrates well with Microsoft Office. Pick the one that makes your task easier.
Uploading The Document
Once you’ve chosen your email service, log into your account. Click on the “Compose” or “New Email” button. This will open a new email window.
Look for an attachment icon. It often looks like a paperclip. Click on it to open a file selection window. Navigate to the location of your signed document. Select the document and click “Open” or “Attach”.
Ensure the document is fully uploaded. You might see a progress bar. Wait until it finishes. Double-check the attachment to make sure it is correct. Your signed document is now ready to send.
Composing The Email
Compose an email by attaching the signed document. Clearly mention the purpose and document details in the email body. Ensure the recipient’s address is correct before sending.
Sending a signed document by email can feel daunting, but it’s simpler than you might think. Once your document is signed and ready, the next crucial step is composing the email. This part is all about clarity and professionalism to ensure your document gets the attention it deserves.
Writing A Clear Subject Line
Your subject line is the first thing your recipient sees. It should be clear and straightforward.
For example, use “Signed Contract Attached” or “Important: Signed Agreement Enclosed.” This lets your recipient know immediately what the email contains and its importance.
Avoid vague subject lines like “Document” or “File Attached.” These can easily be overlooked or mistaken for spam. Make your subject line specific to avoid confusion.
Crafting The Email Body
Start your email with a polite greeting, addressing the recipient by name if possible. This sets a friendly tone.
In the first sentence, mention the signed document and why you are sending it. For instance, “Attached is the signed contract for your review.”
Include a brief explanation of any important details or instructions. If the recipient needs to take action, specify what needs to be done. For example, “Please sign and return by Friday.”
Use bullet points for clarity if there are multiple steps or details. This helps the recipient quickly grasp the information.
Finally, close your email with a polite sign-off. A simple “Thank you” or “Best regards” works well. Don’t forget to double-check the attachment to ensure the signed document is included.
By carefully composing your email, you make it easier for your recipient to understand and act on your message. What strategies do you use to ensure your emails are effective?
Credit: signaturely.com
Adding Additional Recipients
Easily add extra email recipients when sending a signed document. Simply include their email addresses during the sending process. This ensures everyone gets the signed copy.
Adding additional recipients to your email when sending a signed document can be crucial. It ensures that everyone who needs the information gets it, without unnecessary delays. But how do you do this effectively while maintaining privacy and clarity? Let’s dive into some practical steps.
Using Cc And Bcc
When sending a signed document, you might need to add multiple recipients. This is where CC (Carbon Copy) and BCC (Blind Carbon Copy) come in handy.
CC allows you to send the email to multiple people and lets all recipients see who else received the email. This can be useful if transparency is necessary. For example, if you’re sending a contract to a client and want your manager to be in the loop, you can CC them.
BCC, on the other hand, is useful for privacy. Recipients in the BCC field will not be visible to others. This can be helpful when you need to inform multiple parties without disclosing their email addresses. Imagine sending an update to various stakeholders; BCC keeps their contact information private.
Ensuring Privacy
Privacy is crucial when emailing signed documents. You wouldn’t want sensitive information falling into the wrong hands.
When using CC, be mindful of the recipients’ privacy. If the email addresses need to be kept confidential, opt for BCC instead. This is especially important when dealing with clients or stakeholders who may not want their contact information shared.
Additionally, always double-check the recipients before hitting send. A quick review can prevent accidental disclosures. You wouldn’t want to mistakenly send a client’s signed document to another client.
Have you ever faced a situation where you needed to add multiple recipients while keeping some addresses private? Using CC and BCC effectively can solve this dilemma, ensuring your email is both informative and secure.
By carefully considering who you add and how you add them, you can maintain the balance between transparency and privacy. This thoughtful approach can make your communication clear and professional.
Sending The Email
Attach the signed document to your email. Ensure the file is properly named for easy identification. Send to the recipient’s email address, confirming delivery.
Sending a signed document by email is convenient. It saves time and effort. Once you have your document signed, the next step is sending it. This process is simple, but it requires attention to detail.
Reviewing The Email
Before hitting send, review your email. Ensure the subject line is clear. It should mention the signed document. This helps the recipient understand the email’s purpose quickly.
Check the body of the email. Be polite and concise. Mention that the signed document is attached. Offer to answer any questions they might have.
Attachments are crucial. Confirm the signed document is attached. Missing attachments can cause delays and confusion.
Confirming Delivery
After sending the email, confirm its delivery. Use email tracking tools if available. They show if the recipient has opened the email. This helps you follow up if necessary.
Sometimes, emails end up in the spam folder. Contact the recipient if they don’t acknowledge receipt. This ensures they received the signed document.
Keep a copy of the sent email. This serves as proof of delivery. It helps you stay organized and follow up if needed.
“`
Following Up
Following up after sending a signed document by email is crucial. It ensures your document reaches the recipient and is acknowledged. This step helps avoid misunderstandings and keeps the process moving smoothly.
Tracking Email Receipt
Use email tracking tools to confirm receipt. These tools notify you when the recipient opens your email. This confirmation helps you know your document was received. You can also request a read receipt in your email settings. This adds an extra layer of assurance.
Responding To Replies
Promptly respond to any replies you receive. If the recipient needs more information, provide it quickly. Address any questions or concerns they may have. This shows professionalism and keeps the process efficient. Always maintain a polite and clear tone in your responses.
By following these steps, you ensure effective communication. Your signed document will be processed smoothly and without delay.
.gif)
Credit: signeasy.com
Frequently Asked Questions
How Do I Attach A Signed Document To An Email?
Scan or photograph the signed document. Save it as a PDF or JPEG file. Open your email, click “Attach” or “Attach File. ” Select the saved document from your device. Ensure it uploads completely before sending the email.
How Do I Send An Electronically Signed Document?
To send an electronically signed document, use a digital signature service like DocuSign or Adobe Sign. Upload your document, sign it, and email it to the recipient. Ensure the platform you use complies with legal standards for e-signatures.
How Do I Send A Signature Through Email?
Scan your signature. Save it as an image file. Attach the image to your email or insert it into the email body.
How Do I Send A Document With A Signature?
To send a document with a signature, scan or photograph the signed document. Save it as a PDF. Attach the PDF to an email or use a secure file-sharing service to send it.
Conclusion
Sending a signed document by email is simple and efficient. Follow the steps carefully. Use a scanner or a digital signature tool. Attach the signed file to your email. Double-check the recipient’s address. Hit send and confirm receipt. This method saves time and resources.
Improve your workflow with this easy process. Happy emailing!