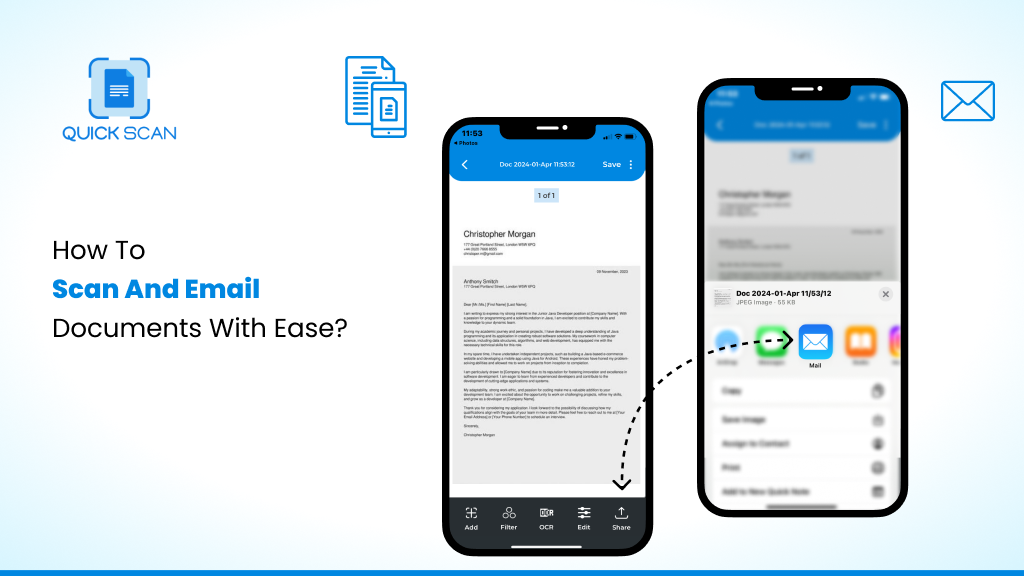
You can scan and email a document using a scanner or smartphone. The process involves scanning the document, saving it, and sending it via email.
Scanning and emailing documents is essential in today’s digital age. Whether you’re sending important paperwork, sharing notes, or submitting forms, understanding this process can save time and effort. With a few simple steps, you can digitize and send your documents quickly.
This guide will walk you through the entire process, making it easy even for beginners. We’ll explore the tools you need, the steps to follow, and tips to ensure your documents are clear and correctly sent. Get ready to simplify your document handling and communication.
Credit: getquickscan.app
Preparing Your Document
First, place your document on the scanner. Next, select the scan option on your device. Finally, save and attach the scanned file to your email.
Preparing Your Document
When you need to scan and email a document, preparing your document properly is crucial. This step ensures that the scanned copy is clear, readable, and professional. Let’s break down the key components of preparing your document.
Choosing The Right Document
First, you need to select the document you want to scan. Make sure it is clean and free from any tears or stains. If you have multiple pages, ensure they are in the correct order.
Selecting the right document also means considering its size. Standard documents like A4 or Letter size are easiest to scan. If you have smaller receipts or notes, you might need to scan them individually.
Ensuring Document Quality
Quality matters. Before scanning, check that the text on your document is sharp and legible. Faint text or marks can be enhanced with a darker pen or pencil.
Smooth out any wrinkles or folds. A flat document scans better. Use a clean, flat surface to lay out the document.
Consider using a dust cloth to clean the scanner bed. Dust or smudges can affect the scan quality. Simple steps like these make a big difference.
By taking the time to prepare your document well, you ensure a smoother scanning process and a better final result. Have you ever struggled with a poorly scanned document? Preparing ahead can save you that hassle.
Setting Up Your Scanner
Connect your scanner to your computer and install the necessary software. Place the document on the scanner bed. Follow prompts to scan and email the document.
Setting up your scanner is the first step to efficiently scan and email documents. Whether you’re a newbie or a tech-savvy user, getting your scanner up and running can be straightforward. This section will guide you through the essential steps, ensuring your scanner is ready for use.
Connecting The Scanner
To begin, ensure your scanner is properly connected to your computer.
Use a USB cable for a reliable connection.
If your scanner supports wireless connectivity, make sure it’s connected to the same network as your computer.
Check the power source. Make sure your scanner is plugged in and turned on.
Installing Scanner Software
Once your scanner is connected, the next step is installing the necessary software.
Most scanners come with a CD or a link to download the software. Follow the installation prompts.
If you don’t have the CD, visit the manufacturer’s website. Look for the drivers and software specific to your scanner model.
After installation, open the software to verify the scanner is recognized.
Can you see the scanner listed under connected devices? If yes, you are ready to scan.
Setting up your scanner doesn’t have to be a daunting task. By connecting the scanner correctly and installing the right software, you are set to scan and email your documents effortlessly.
Scanning The Document
Scanning a document is a simple process. It involves using a scanner to convert paper documents into digital files. This guide will help you understand the steps involved in scanning a document. Follow these easy steps to ensure a successful scan.
Placing The Document
First, place the document on the scanner bed. Make sure the document is flat and not wrinkled. Align the document with the guides on the scanner bed. This ensures the scanned image is straight and clear. Close the scanner lid to avoid any shadows.
Adjusting Scan Settings
Next, adjust the scan settings on your computer. Choose the resolution based on your needs. For text documents, a resolution of 300 dpi is ideal. For images, you may need a higher resolution. Select the color mode. Use grayscale for black and white documents. Use color for colored documents.
Choose the file format. PDF is best for text documents. JPEG is good for images. Make sure to select the right format to avoid any issues later.
Initiating The Scan
Now, initiate the scan. Open the scanner software on your computer. Click the scan button. Wait for the scanner to complete the process. Check the preview on your screen. Ensure the scanned image is clear and readable. Save the file to your computer. Name the file so you can find it easily later.
Scanning a document is easy if you follow these steps. Soon, you’ll have a perfect digital copy of your document ready to email.

Credit: www.wikihow.com
Saving The Scanned Document
Scan and save your document using a scanner or smartphone app. Open your email, attach the saved document, and send it. It’s that simple. Once your recipient receives the document, they can review it at their convenience. If any signatures are required, this method allows you to send signed documents via email efficiently. In just a few clicks, you can ensure that important paperwork is delivered securely.
Saving the scanned document is a crucial step after scanning and emailing. This ensures your document is easy to access, share, and keep organized. But how can you make this process seamless and efficient? Let’s dive into the details of choosing the right file format and naming your file properly.
Choosing File Format
Selecting the correct file format can make a significant difference. The most common formats are PDF and JPEG.
PDFs are ideal for documents with multiple pages or text-heavy content. They preserve the layout and are universally accepted.
JPEGs are better for images or single-page documents. They are easy to view and share, but may not retain text quality as well as PDFs.
Think about the purpose of your document. Are you sending a contract or a photo? Choose accordingly.
Naming And Saving The File
Naming your file properly is just as important. A clear, descriptive name will make it easy to find later. Avoid using generic names like “scan1” or “document.”
Instead, use specific names such as “Invoice_July2023” or “Smith_Contract_Signed.” This way, you can quickly identify the document without opening it.
Save your file in a location that’s easy to access. You can create folders based on categories like “Work,” “Personal,” or “Receipts.”
A well-organized system saves you time and stress when you need to find a document quickly.
How do you prefer to name and organize your scanned documents? Does your current system work for you, or is it time for a change?
By following these simple steps, you can ensure that your scanned documents are easy to manage and share.
Composing The Email
After you’ve scanned your document, the next step is to compose the email to send it. This process is straightforward but can have a big impact on how your recipient perceives your message. Here’s a breakdown of how to do it effectively.
Opening Your Email Client
First, open your email client. This could be Outlook, Gmail, Yahoo, or any other service you use. Make sure you are logged in to the correct account.
Most email clients have a ‘Compose’ button that you will need to click to start drafting your email. This button is usually prominently displayed on the main screen.
Once you click ‘Compose’, a new email window will open. This is where you will enter all the necessary details.
Entering Recipient Information
In the ‘To’ field, enter the email address of the person you want to send the document to. Double-check the address to avoid sending it to the wrong person.
If you need to send the document to multiple recipients, separate each email address with a comma. Use the ‘CC’ and ‘BCC’ fields to include additional people if necessary.
Adding a clear and concise subject line helps the recipient understand the purpose of your email. Something like “Scanned Document: [Document Name]” works well.
Writing The Email Body
Start your email with a polite greeting. “Hello [Recipient’s Name],” is a simple and effective way to begin.
In the first paragraph, briefly explain why you are sending the document. For example, “Attached is the scanned document you requested.”
Include any additional information the recipient needs to know. If the document requires action, specify what needs to be done and by when.
Close the email with a polite sign-off. “Thank you,” or “Best regards,” followed by your name works well.
Make sure to attach the scanned document before hitting send. It’s easy to forget this step, but it’s crucial to the success of your email.
Have you ever sent an email without attaching the file? It’s frustrating, right? Double-checking can save you from this common mistake.
By following these steps, you’ll compose an effective email that ensures your scanned document reaches the right person with all necessary context.
Attaching The Scanned Document
Once you have scanned your document, the next step is to attach it to an email. This process involves finding the saved file on your computer and then attaching it to your email. This may seem daunting, but with simple steps, it becomes easy.
Finding The Saved File
First, locate the scanned document on your computer. Open the folder where your scanned documents are saved. This is usually the “Documents” or “Scans” folder. If you are unsure, check the settings of your scanner software. It will show where it saves scanned files.
Look for the file name or the date you scanned the document. Once you find it, you are ready to attach it to your email.
Attaching The File To The Email
Open your email service and start a new email. Look for the attachment icon. This icon is often a paperclip. Click on it to open the file browser. Once you have located the file you wish to attach, double-click on it to select it for uploading. After the attachment is added to your email, it’s important to know how to save an email attachment if you receive one. This typically involves clicking on the attachment and selecting the download option from the dropdown menu.
Navigate to the folder where you saved your scanned document. Click on the file to select it. Then, click “Open” or “Attach” to add the file to your email.
Check that the file is attached correctly. You should see the file name in the email. Now, you can write your message and send the email.
Review And Send
Scan and email a document easily with these steps. First, use a scanner or scanning app. Then, attach the scanned file to an email.
Review and Send
Once you have scanned your document, the next crucial step is to review and send it via email. This stage is just as important as the scanning process. A thorough review ensures you send the correct information and maintain a professional image.
Double-Checking Details
Before sending your scanned document, always double-check the details. Ensure the scanned document is clear and all pages are included.
Verify the recipient’s email address. An incorrect email can delay your communication or send sensitive data to the wrong person.
Check your email’s subject line and body for clarity. A concise and clear subject line helps the recipient understand the email’s purpose immediately.
Sending the Email
Now that you’ve reviewed your document, it’s time to send the email. Attach the scanned document to your email. Make sure to add a brief but informative message in the email body.
A simple message like, “Please find attached the document you requested,” can suffice. However, you can add more details if necessary, such as deadlines or action items.
Finally, hit the “Send” button. Confirm that the email has been sent successfully, and consider following up if you don’t receive a response within a reasonable timeframe.
Have you ever sent an important email only to realize you forgot to attach the document? Double-checking can save you from such embarrassing moments.

Credit: www.wikihow.com
Troubleshooting
Scanning and emailing a document involves using a scanner or a multifunction printer. Place the document on the scanner, then select the scan option. Save the scanned file and attach it to your email.
Troubleshooting
Scanning and emailing documents can be straightforward, but sometimes things go wrong. You’ve followed all the steps, but it just won’t work. Don’t worry; you’re not alone. Here are some common issues and how to fix them.
Common Scanning Issues
Sometimes the scanner just won’t cooperate. Is your scanner not turning on? Check the power cable and make sure it’s plugged in properly. If it’s a wireless scanner, ensure it’s connected to your Wi-Fi network.
Are you getting blurry or incomplete scans? Wipe the scanner glass with a soft cloth. Dust or smudges can interfere with the scanning process.
Is the scanner software acting up? Restart your computer and try again. Sometimes, a simple reboot can solve many technical glitches.
Email Attachment Problems
Attaching a scanned document to an email should be easy, but issues can arise. Is your file too large? Compress the file or convert it to a PDF to make it smaller.
Are you struggling with email attachment limits? Use a cloud service like Google Drive or Dropbox. Share the link in your email instead of attaching the file directly.
Is the recipient not receiving your email? Double-check their email address for typos. If it’s correct, ask them to check their spam or junk folder.
Have you ever faced these issues? What solutions worked for you? Share your experiences in the comments below. Troubleshooting can be frustrating, but with these tips, you’ll be back to scanning and emailing in no time.
Frequently Asked Questions
How Do I Scan A Document And Attach It To An Email?
To scan a document, use a scanner or scanning app. Save the file to your device. Open your email, click attach, and select the scanned document. Send the email.
How Do You Scan A Document And Send It To Your Computer?
Connect your scanner to your computer. Place the document on the scanner. Open scanning software and select scan. Save the scanned document to your computer.
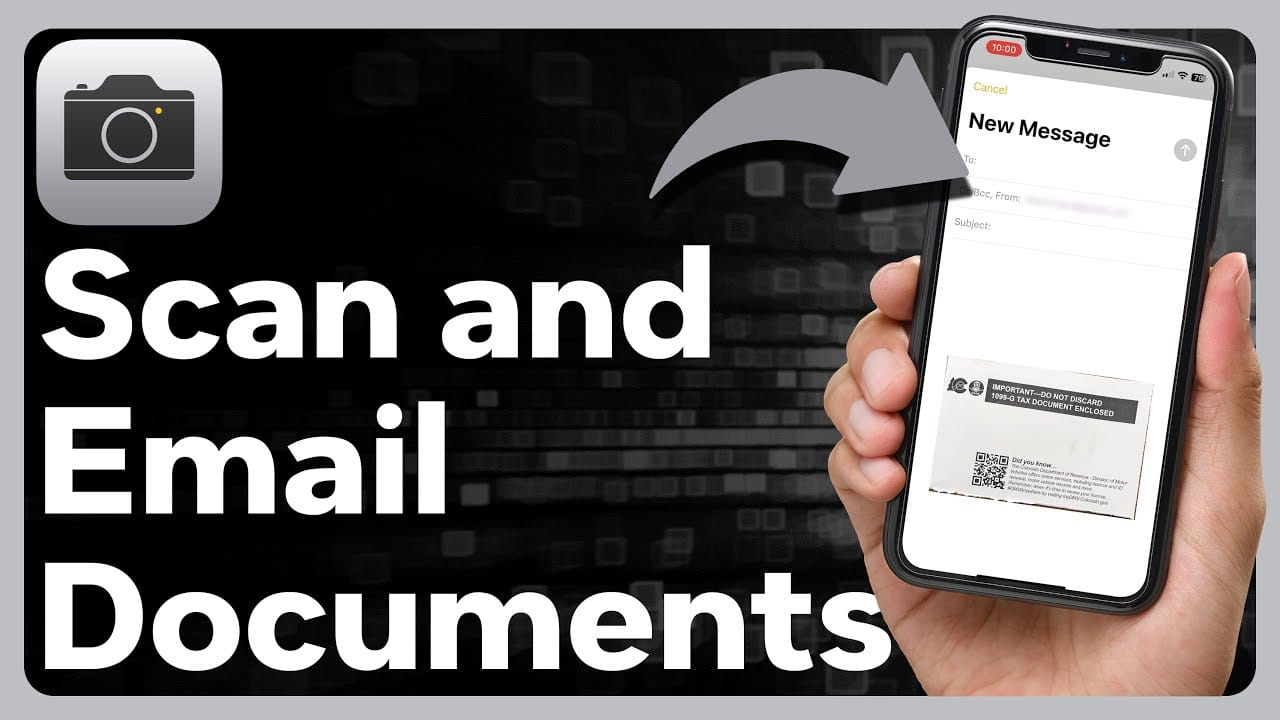
How Can I Scan And Email A Document From My Iphone?
Open the Notes app. Tap the camera icon and choose “Scan Documents. ” Scan, save, and share via email.
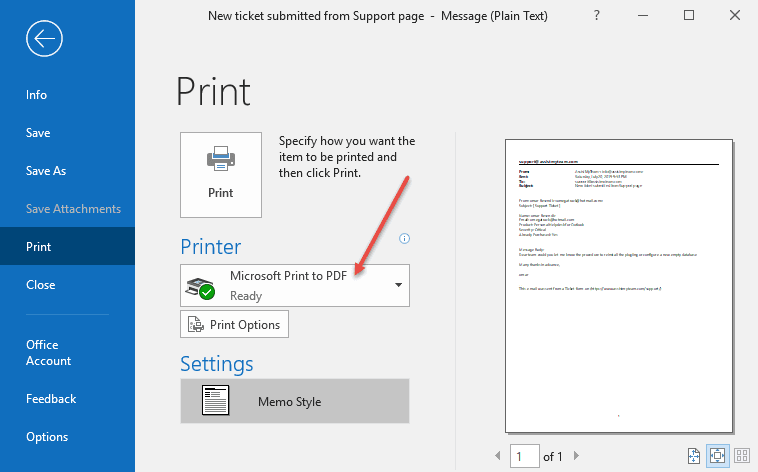
How Do I Scan A Document And Send It As A Pdf?
Use a scanner or scanning app to scan the document. Save it as a PDF. Email or upload the PDF.
Conclusion
Scanning and emailing a document is simple with the right steps. First, choose a scanner or app. Next, follow the prompts to scan your document. Check the scan for clarity. Save the scanned file to your device. Open your email and attach the file.
Finally, send the email to the desired recipient. By following these steps, you can easily handle digital documents. Practice a few times to become familiar. Soon, you’ll find the process quick and effortless. Happy scanning!